Redirect Domain with SSL on Cloudflare
To redirect an entire domain with SSL to a single page, you can use the free account on Cloudflare. Let me show you how.
Why?
I do a lot of experiments on various different projects. When those run their course, I like to redirect the domain to the blog entry I wrote up after the experiment ended. While a lot of domain registrars offer this for free, they don’t support SSL. When I first ran into this, I launched RedirectURL instead of using Cloudflare. I think half the reason was ignorance, half I wanted to have a service to try to monetize, and half because the base configuration at the time in Cloudflare maybe wasn’t free - or I couldn’t figure it out. (Also I’m great at math…)
So now, you can handle this situation with Cloudflare.
What I Want to Do
I want to redirect redirecturl.io to https://www.aaronsaray.com/2020/redirecturl-experiment-is-done. This means I have to do the following:
- Make sure
www.redirecturl.iois handled and redirects to that page - Make sure that
redirecturl.iois handled and redirects to that page - Make sure both of them respond on SSL as well
How?
Here’s how you do it
First, sign up at Cloudflare for your free account.
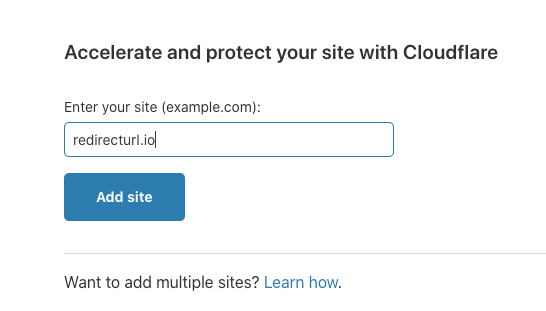
When you first sign up, they might already help you by directing you to add a site. Otherwise, click Add a Site on your main dashboard.
Enter your domain in the site box and click Add Site.
Next, it’ll ask you what plan you want. I chose the Free one and clicked Confirm plan.
Next, it scans for DNS records. Depending on what you have set up, you may have a bunch of records or none at all. I’m going to delete all of my DNS records and start fresh. (You may want to keep your MX records if you have mail service, or your TXT records if you have other things set up.)
I added two records.
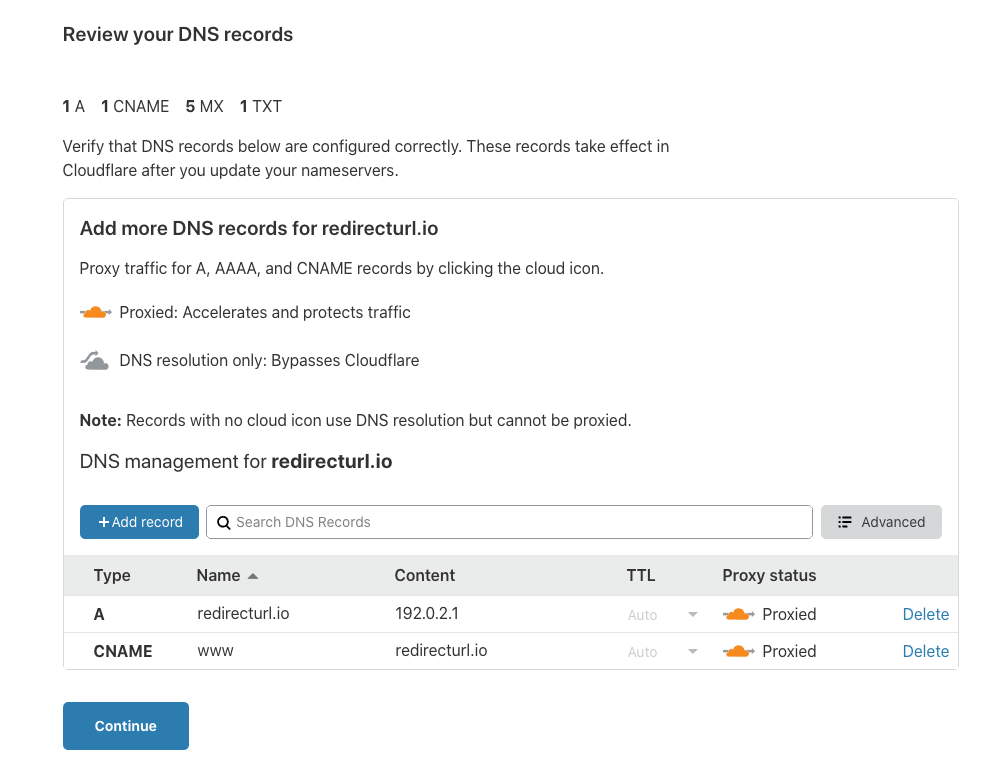
The first was an A Record pointing to a reserved IP address. You need an A record in order for Cloudflare to start to route your requests. We need that orange cloud on the screen for proxying. I picked a useless destination because I know that I’m going to create a page rule later. As suggested, enter @ for the root and then enter in 192.0.2.1 for the content value.
The second is a CNAME Record pointing www to the base url redirecturl.io. This will allow Cloudflare to redirect www.redirecturl.io in a round-about way (there are other ways to do this but this is probably the easiest and most self-explanatory setup).
Click Continue.
You’ll be asked to change your nameservers now.
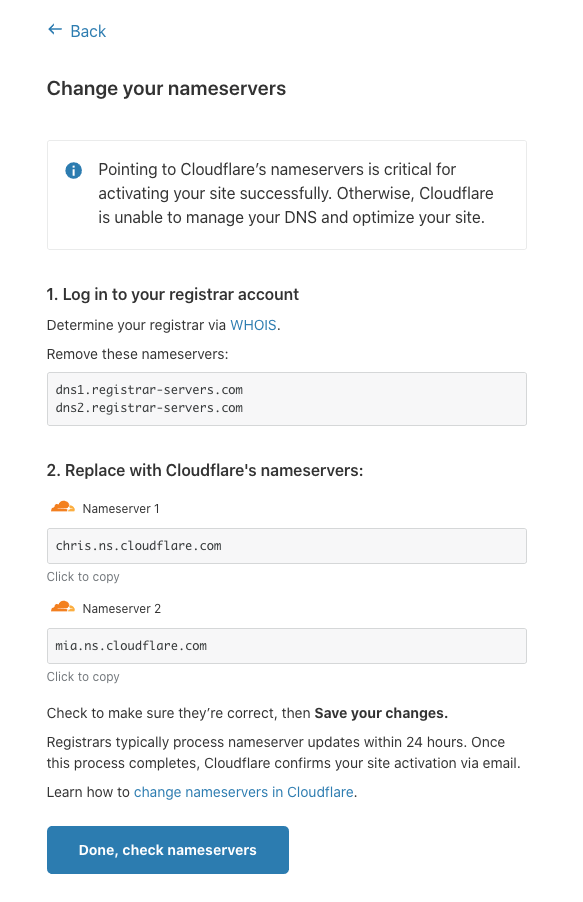
I did this at Namecheap (my registrar) and saved it. It will take a little bit of time for these to update.

Click Done
When asked to configure more, choose Finish Later
Now, Cloudflare will watch and let you know when the DNS has been updated. In the mean time, we can continue.
Click the SSL/TLS menu item. We want to confirm that SSL is enabled for our domain.
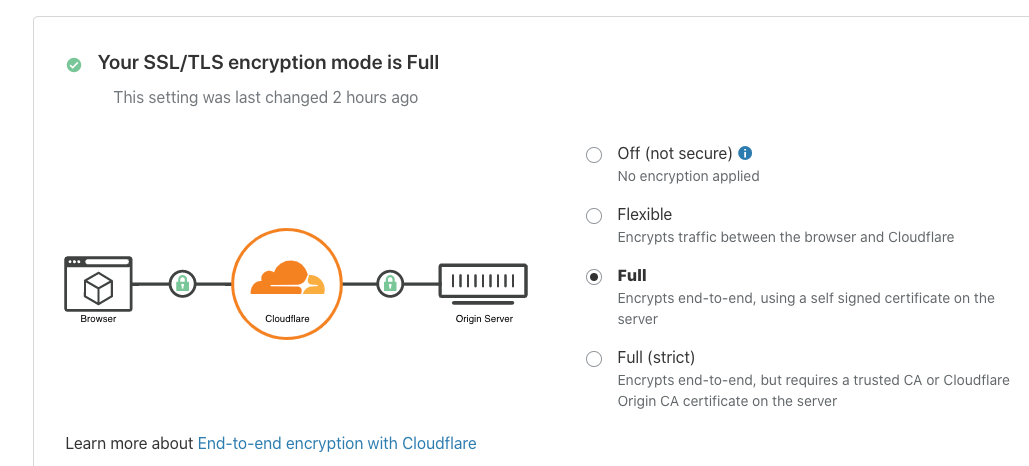
Leaving it at Full mode is fine.
Then, click the Page Rules menu item. Click the Create Page Rule option.
You want to enter your main url in the URL matches box with a wildcard to match any URL. I entered redirecturl.io/*
Then pick the Forwarding URL setting, select the 301 Permanent Redirect status code.
For your destination URL, enter where you’d like visitors to end up using the full protocol and URL.
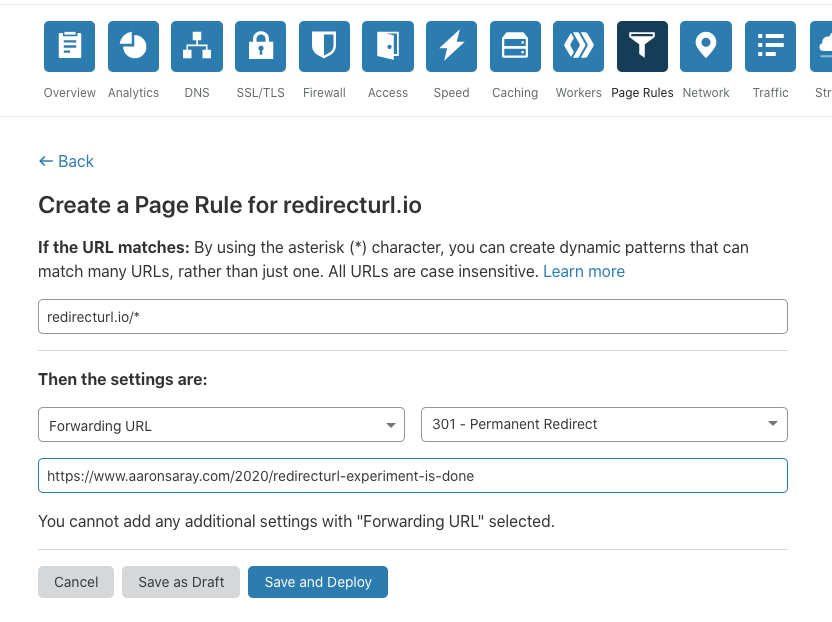
Click Save and Deploy
Click Create Page Rule again. This time enter the www version of your domain with the wildcard. Pick Forwarding URL again and choose 301 Permanent Redirect. This time, enter your base URL with SSL protocol.
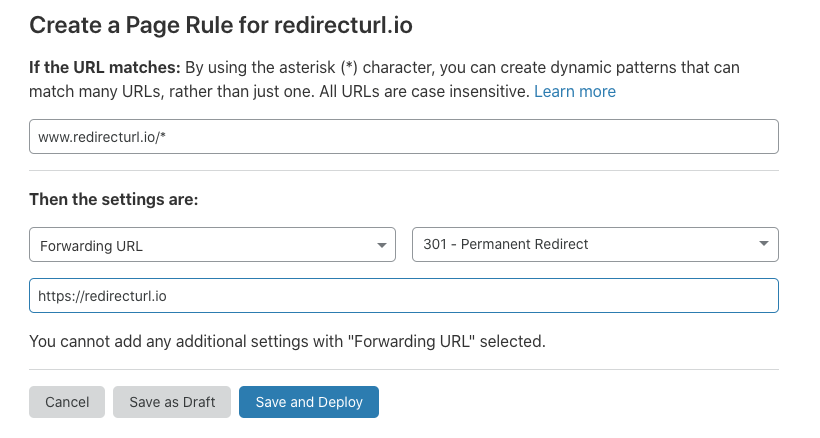
Click Save and Deploy
Now you’re done. When Cloudflare is finally resolving your site, you’ll see this message:
