The End of QuickPic
QuickPic.dev was a site for quick edits, crops and touch-ups in your browser. After a year of stagnation, I think its time to move on - and share what I’ve learned.
Initial Idea / Motivation
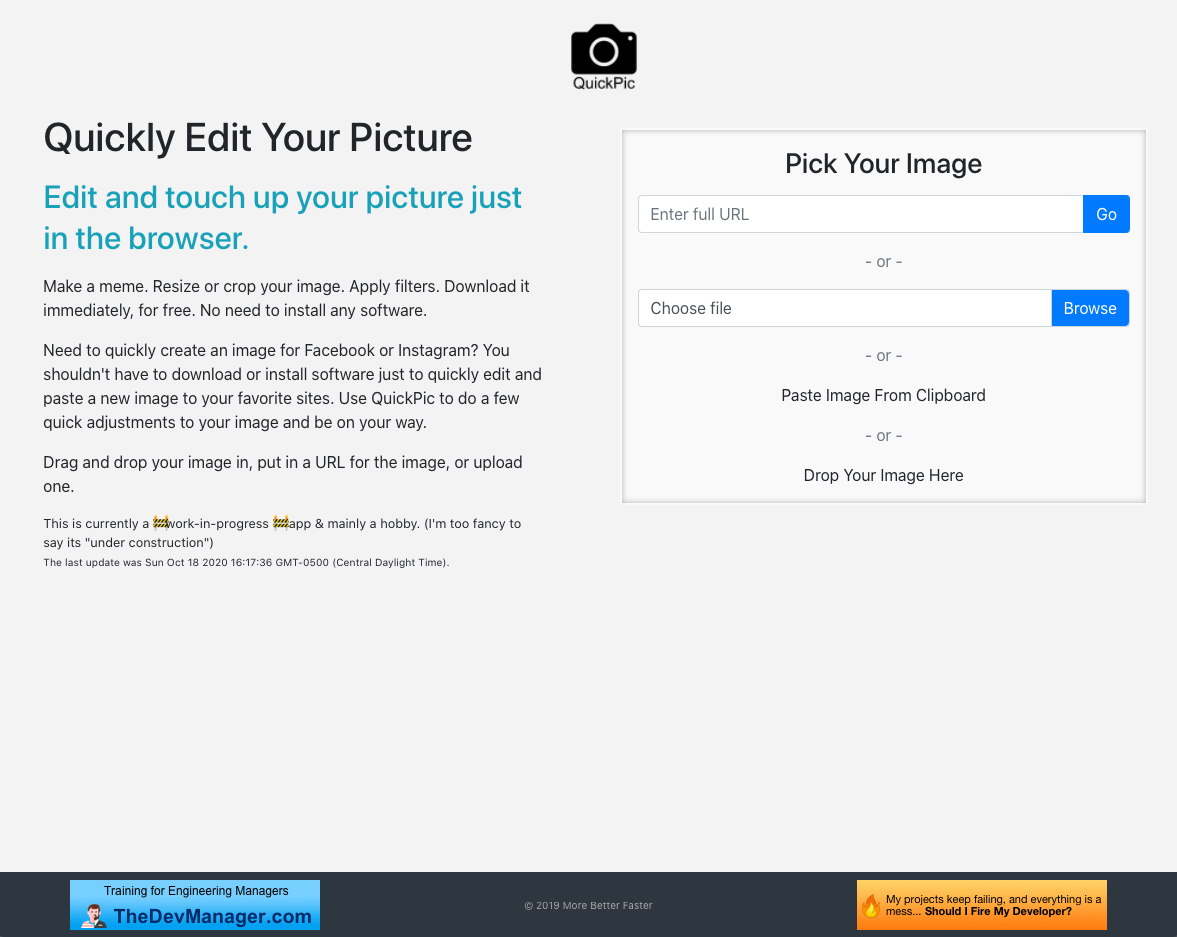
The initial idea was to have a website where you could easily drop in an image and resize it, crop it or meme it. This came out of a few thoughts I had:
- I loved generating memes online, but I hated that they were always watermarked for advertising
- I often wanted to resize or crop an image real quick for optimal sharing or profile size on my social network posts or profile
- Sometimes an image just needed to be lightened up or contrast adjusted. I don’t want to fire up a big editor
- Sometimes I have it on my clipboard, sometimes on my desktop, sometimes just the URL. I wanted to easily drag or paste in my source - the tool should figure it out
- I wanted to work on my Javascript and Vue, as well as demonstrate that you can edit images in the browser, you didn’t need a backend to generate the download
Challenges
First of all, there are competitors out there (like Canva). More and more big time people like Adobe, Google or Microsoft are allowing more editing as well in the browser.
Second, with all the work that this would take, I couldn’t think of a monetization strategy besides ads. And I don’t like ads (I block them myself). I do give back to open source and host a number of free products already for the internet. I didn’t want to add on more cost + load.
Third, I have other ideas that I want to go after. I thought this was cool, but the fact that I haven’t gotten back to it since I first started it kind of indicates that I’m not interested.
What Were the Cool Features?
Not only do I want to talk about the user-facing features, but I want to pin-point why those were technically interesting or difficult.
First, and very least, I was super excited about using CSS animations to move over the logo from the center to the side, like this.

When you engaged the app, it would try to minimize the landing page information so you had the most useful information available.
Next was the actual image loading functionality. You could paste it from your clipboard. If the pasted item was identified as an image, it’d import it into the app. You could also choose to load it from the normal file dialog - or - to drag and drop it onto the app. Finally, loading from the URL. To try to get around some of the cross-site request issues, loaded it as a javascript Image instead of fetching it.
When the main image was loaded in, the background ’transparency’ was created using CSS gradients. This way another image didn’t have to be loaded to indicate the transparency of the loaded images.
The image was loaded in as a canvas item. This allows us to manipulate it as well as generate data blobs from it.
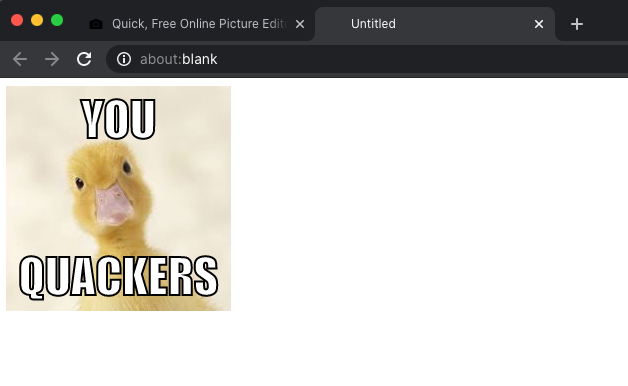
I had wanted to add in some functionality for editing the image colors with something like CanmanJS. I did allow Meme editing with a browser-font and some styling. It was important to note that the initial overlay was done NOT on the canvas (because that would actually be more complicated to allow undo). It’s just overlayed with CSS. When the output was generated, that’s when it was written to the Canvas. Otherwise we’d have to version the canvas on every single keystroke - and that would be pretty browser-intensive.
Also, the image was zoomed if it was larger than the viewport. The original size image was kept in data, but the representation of it was zoomed out.
Then you could download the image or open it in a new tab. This was actually quite complicated because of the blob data that needed to be created from the post-processed canvas. A lot of examples of image editing showed downloading it from a server, but I wanted to not send anything to the back-end.
Usage
Let’s see a quick animated gif of it being used.
And the final download from that.

Source Code
You can find the archived source code on Github.
What ToDo Was Remaining?
I had wanted to do the following things:
- Add actual unit tests - consider adding in PercyJS testing for visual regressions
- Address the issue where sometimes the image was 50.00000001%
- Add a different background for transparent image so it was more obvious which parts were transparent say if it was a gray/white image
- Meme text wrapping and placement of text
- Meme auto change the font size based on the length of the words
- Figure out an issue where there was extra padding at the bottom of the page sometimes when the image was resized
- Create common crop sizes like twitter header/profile images, linkedin, and OG image sizes
- optimization of images (compression)
- edit image colors, brightness, etc.
- upload to something like giphy directly from the browser
- copy the image to the clipboard
- alter the zoom that we chose to show the image on the screen
What Next?
Well, I’m going to let the domain expire and then this project is archived. You can grab the Github source if you’d like, or make a new copy of it. Let me know if you want to take it over sooner than it expires.