Add a Case-Sensitive Disk in MacOS
In an earlier entry here, I described the need for a case-sensitive disk in my development set up. I’ve enjoyed using my SD-based drive, but I wanted to change to using my own drive for two reasons: a) I have 1TB drive, so I have plenty of space and b) the SD is slower than the SSD - at least last time I tested it was.
So as I had mentioned in that earlier entry, I wanted to give a report on the performance, too. Grade A - was easy, just not as fast as I’d like.
So, let’s make our own drive have a case-sensitive partition. A tiny bit of background here:
Your harddrive normally has 1 partition with one logical drive on it, formatted with a case-insensitive MacOS filesystem. That means that abc.php and AbC.php are recognized as the same file. However, disks can have multiple partitions on them (they can have multiple volumes, etc - but that’s beyond what we’re going to cover here.) Each partition can create a volume that can have a different format.
Warning Sadly, since case-insensitivity is very common (Microsoft desktop filesystems, mac filesystems for a long time, etc…) there are programs that will NOT function properly on a case-sensitive filesystem. Do not convert your whole drive to this new format - unless you absolutely know what you’re doing. Instead, we’re doing something different.
I’m going to repartition my existing drive - basically sizing the existing partition smaller than 100% of the drive, adding a new one, with a new format. Then, I’ll move all my case-sensitive files to that new drive (similar to how I had done with the earlier entry.)
Make a New Partition
Open the Disk Utility Application.
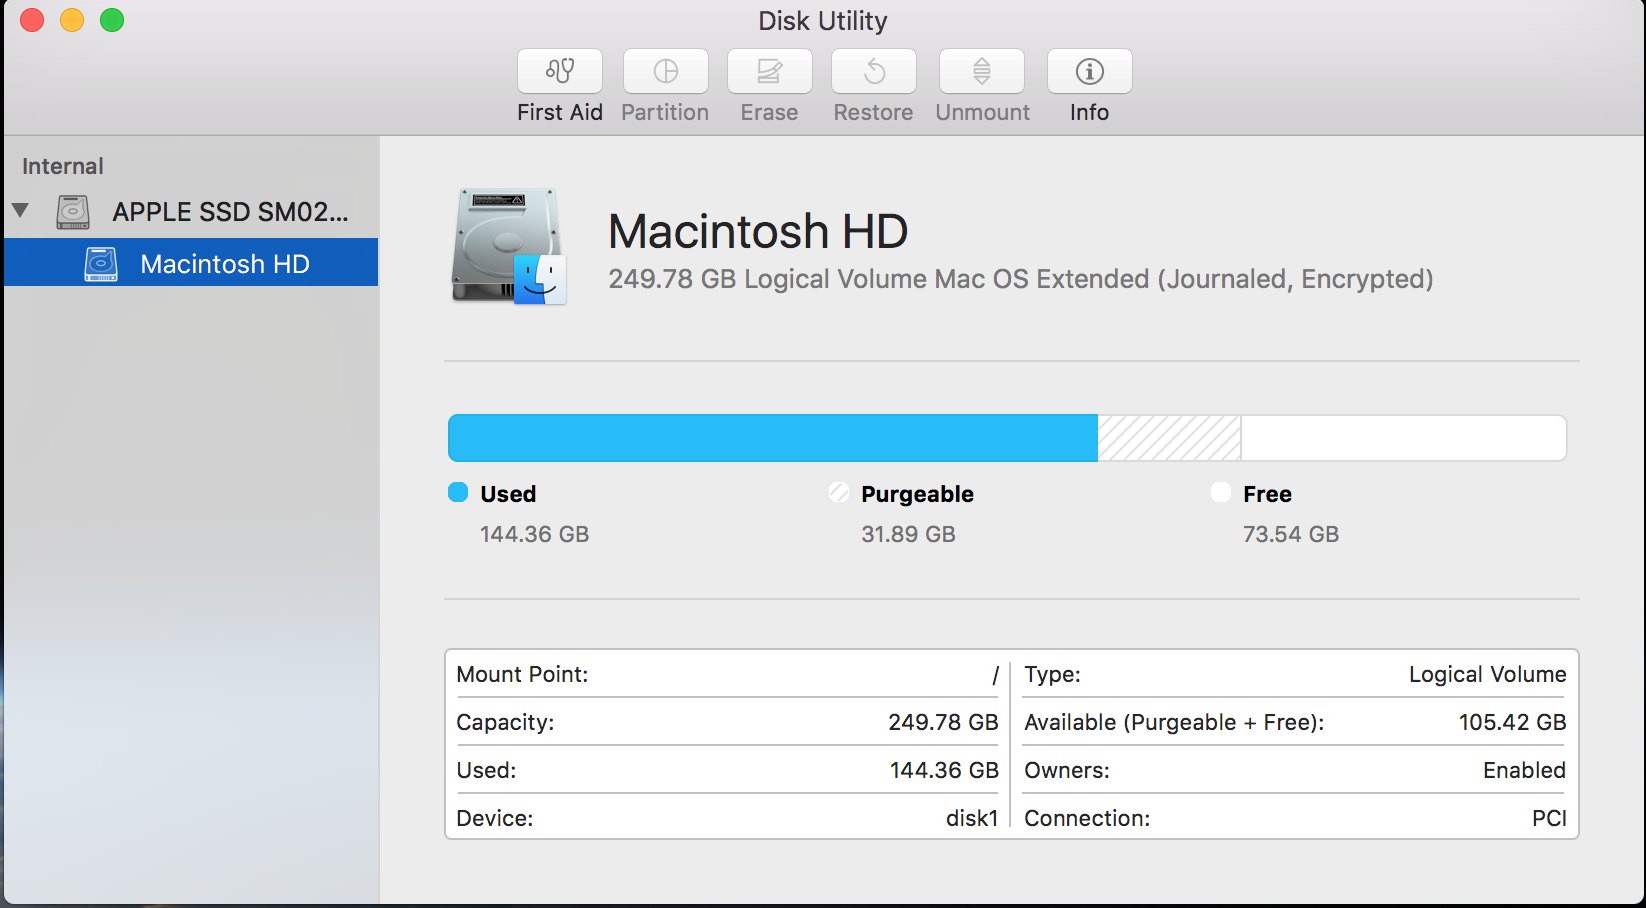
You will most likely see something very similar to this. Click up one level on the actual drive, then click the Partition button at the top of the window. You’ll see something like this.
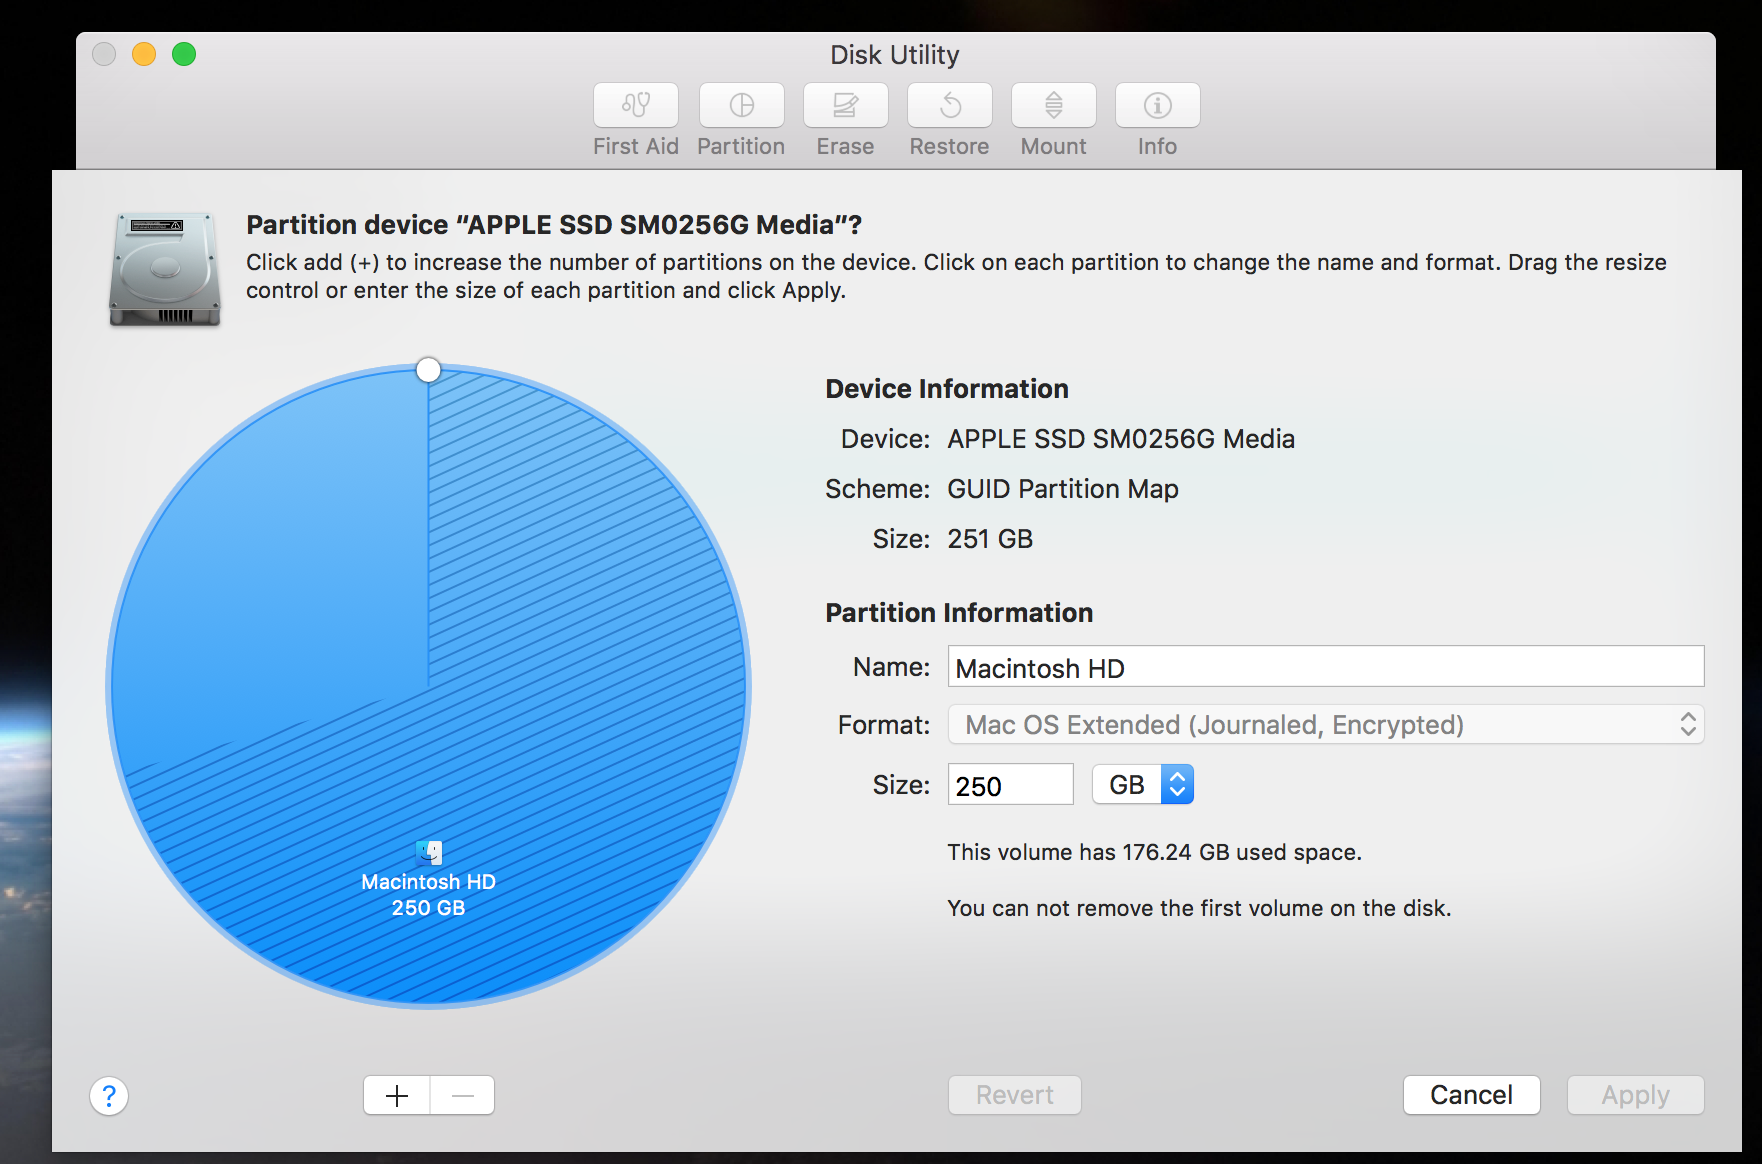
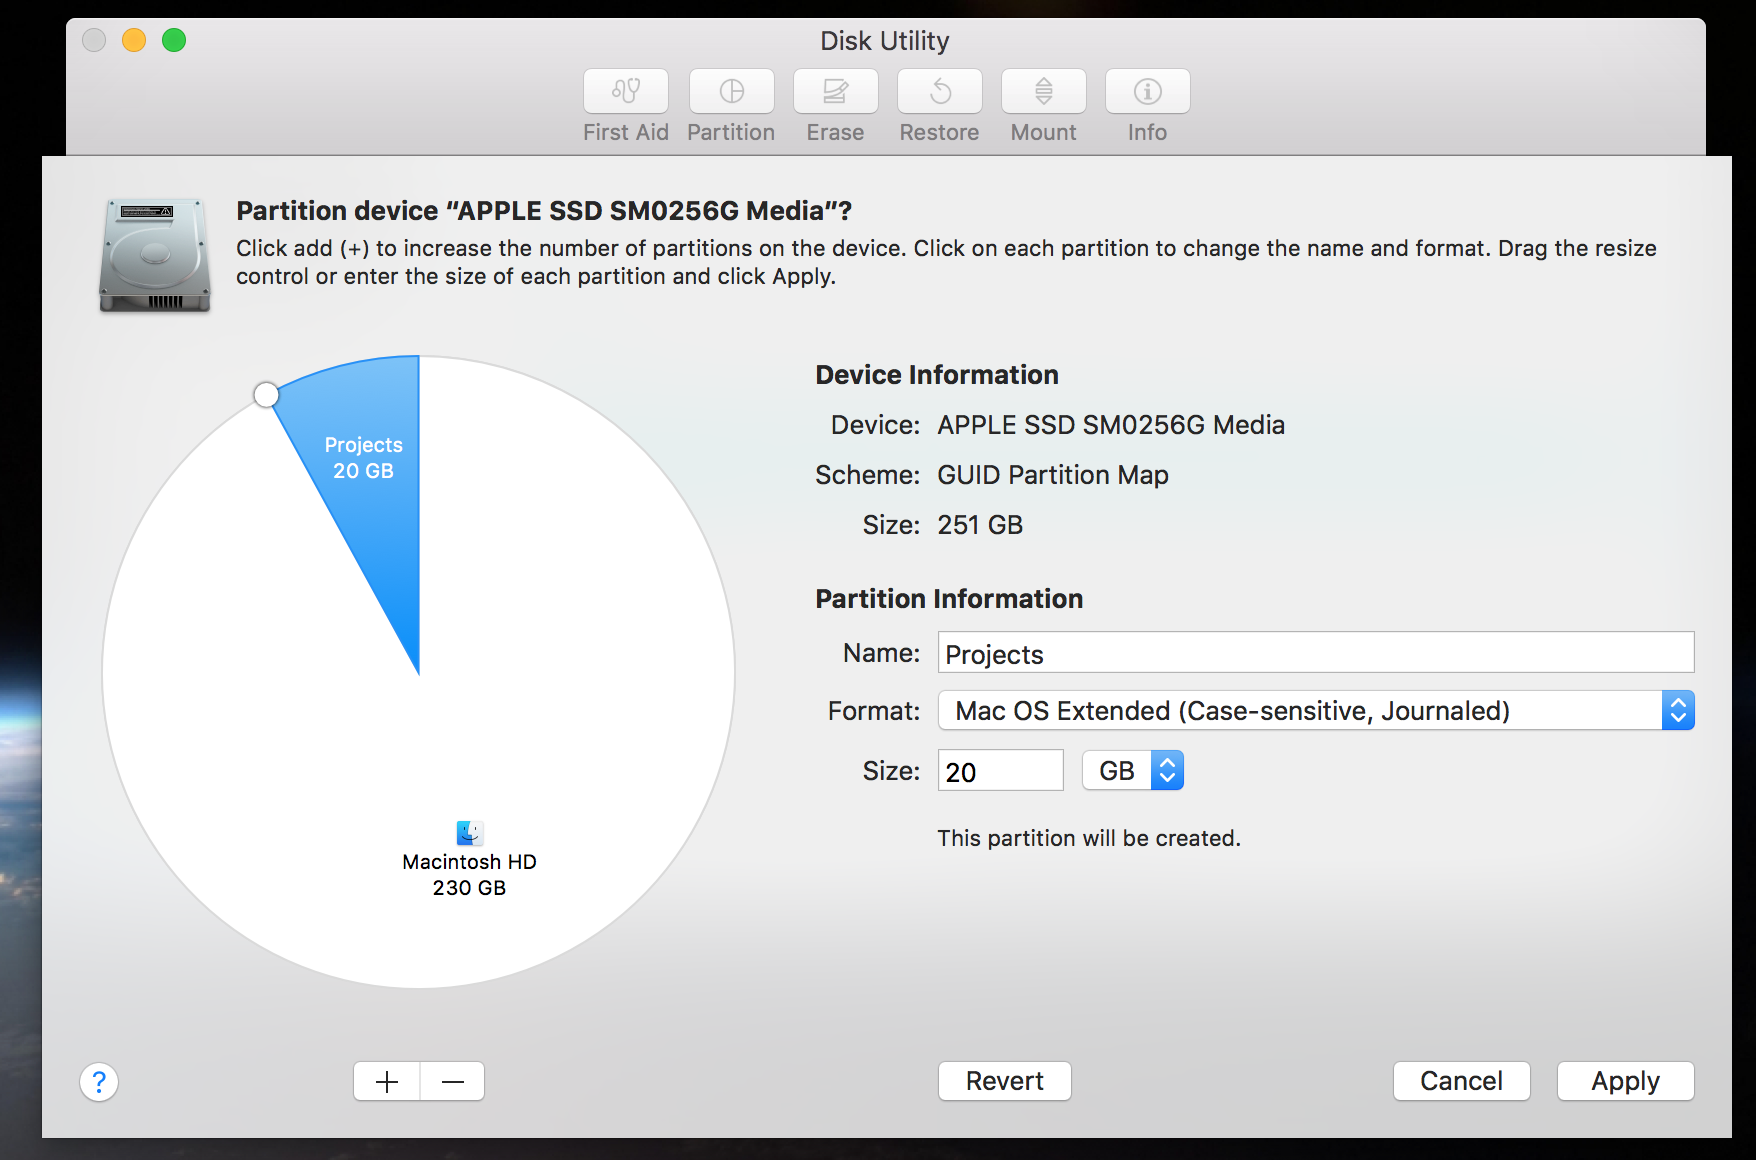
Now, you can select the size for your new drive. I’m choosing 20GB - I don’t work with many large files - and this is only for files, not for your VM’s or docker containers (they honor the host filesystem and contain their own, but don’t require the container to be on case-sensitive).
Give it a name, and then choose the case-sensitive, journaled type.
Then, you’ll need to confirm this.
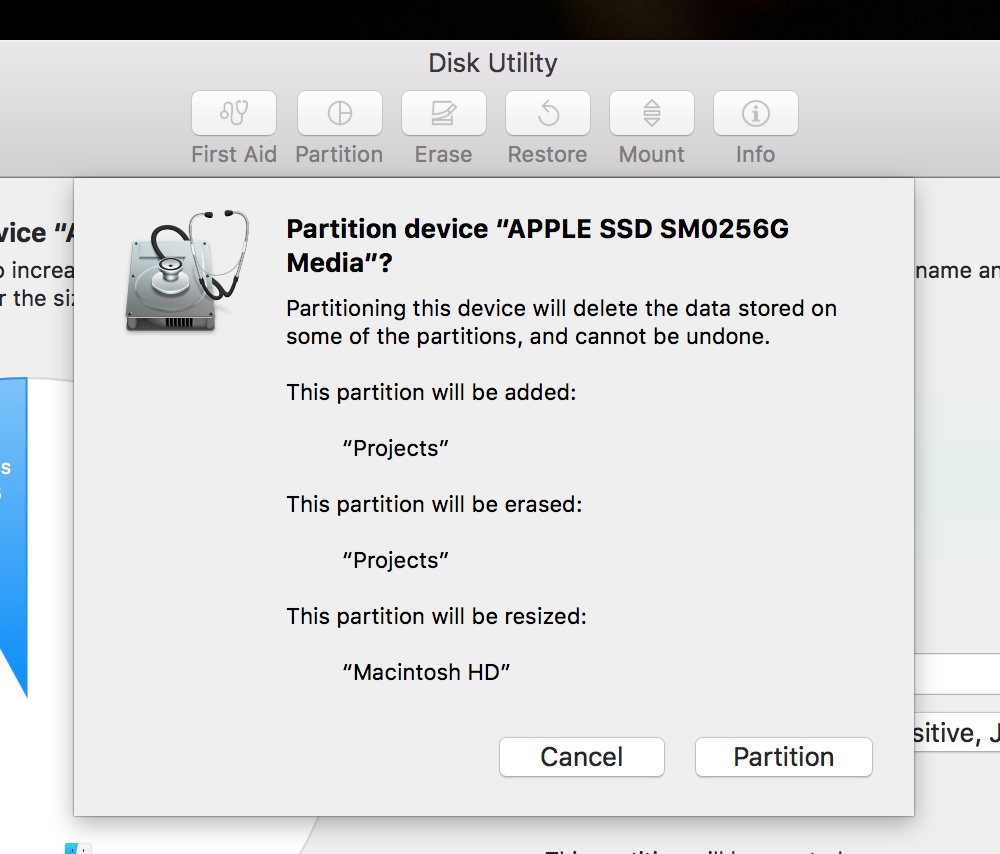
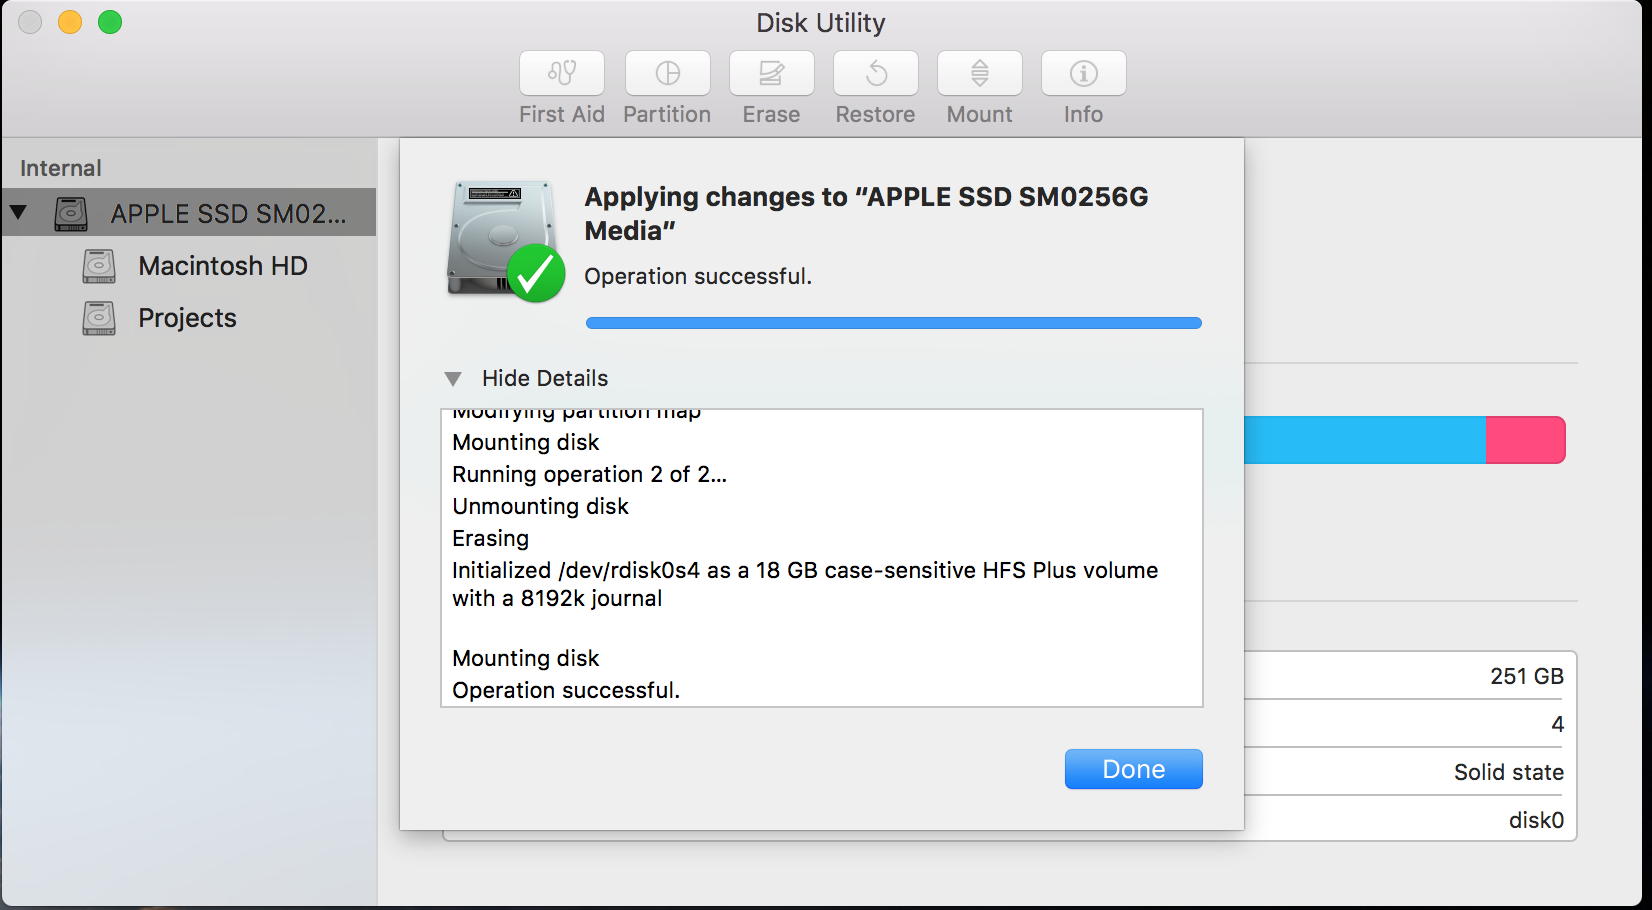
During the next process, it’ll actually do the conversion. This may take a little while. Don’t freak out if it seems like the computer freezes up - or if you see the beachball appear a lot. In fact, mine did it a few times. But in the mean time, I could see progress like “Checking Catalog, Checking multi-linked files, checking catalog hierarchy”
Finally, you’re done.
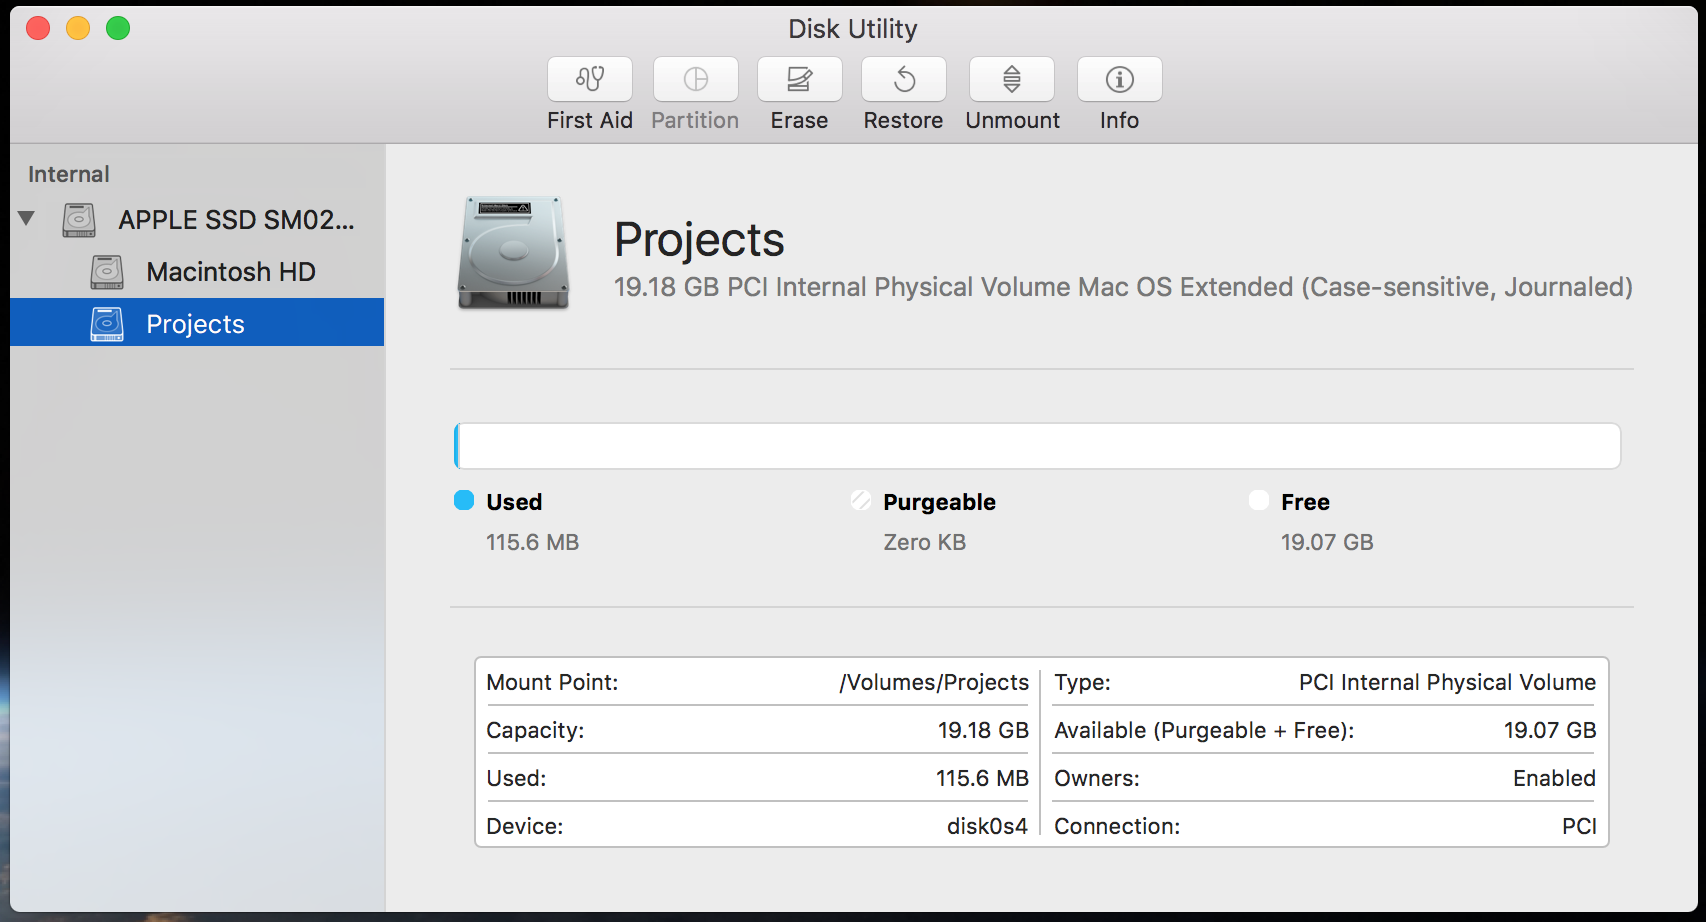
Notice how you can now see the new drive on the left hand side?
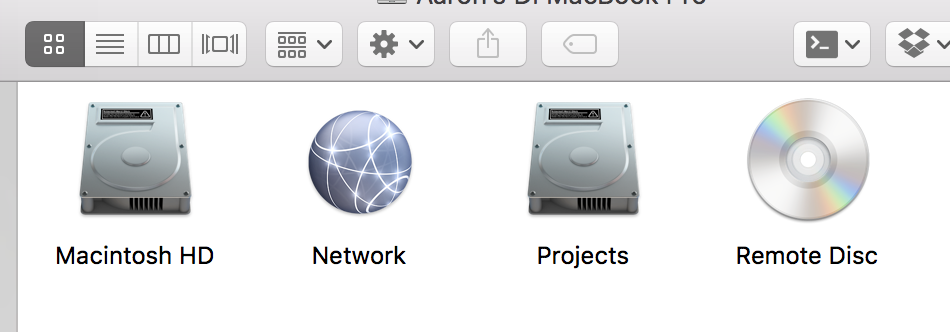
And it’s now in the Computer view as well.
Setting Up Your Workflow
Similar to the last entry, you might want to set up a few things to make this easier to work with.
First of all, your new drive is located in the Volumes mount point - so if you named yours like mine, you can find your new files at /Volumes/Projects
To make this easier, you might want to drag this drive into a favorites position on your finder. You might also want to make a symbolic link like maybe this:
ln -s /Volumes/Projects ~/Sites
This will put a link in your home directory for your projects.
The End
And that’s it - now you have a case-sensitive partition on your normal drive. But remember, if you don’t have enough space in your drive for something like this, you can still do it on a SD card, like I did here.